Are you planning to apply for a passport and wondering how to take a passport photo with your iPhone? With the right techniques and tools, capturing a high-quality passport photo using your smartphone is easier than ever. In this guide, we'll introduce how to take passport photo with iPhone that meets all the requirements and give some tips to help you enhance and perfect your image.
You may also like: 10 Best Background Editors to Modify Photo Background
Reading Guide
Part 1: Preparation Before Taking Passport Photo with iPhone
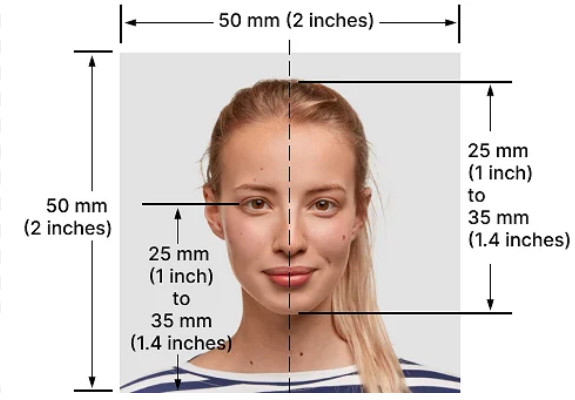
Before you start snapping away, it's crucial to understand the specific requirements for passport photos. These typically include size, background, expression, and pose. Knowing these in advance will help you set up the perfect shot. Here are the details:
- Size: The standard dimensions for a passport photo are usually 2x2 inches. The head must be between 1 and 1.4 inches (25 to 35 mm).
- Background: The background is usually required to be white or light-colored.
- Expression and Pose: The subject must face the camera directly, with a neutral expression and both eyes open. Hats or head coverings are not permitted unless for religious purposes, and you are required to remove glasses and other accessories that obscure your face.
Part 2: How to Take Passport Photo with iPhone
Now that you've got a clear understanding of the requirements, it's time to put your iPhone to work and take a perfect passport photo. With the following simple steps, you can ensure your photo is not only compliant but also of the highest quality.
1 Choose the Right Background
Start by selecting a plain, light-colored background. This is typically white or off-white, as it's the most common requirement for passport photos. Ensure there are no patterns or objects that could distract from your face.
2 Adjust the Lighting
Natural light is often the best choice for passport photos, providing a soft, even illumination. Position yourself near a window or outdoors in a shaded area to take advantage of this. Avoid harsh, direct sunlight, which can create unflattering shadows.
3 Set Up Your iPhone Camera
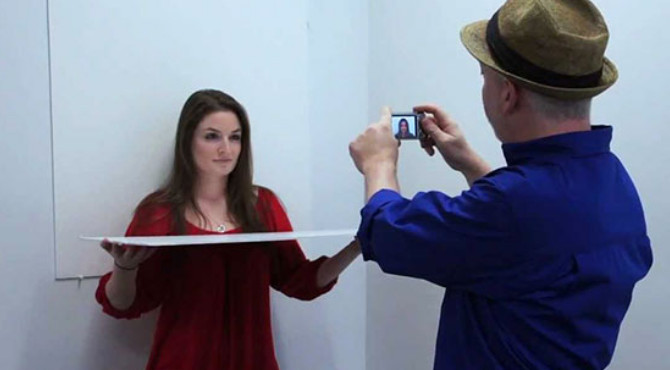
Use the iPhone's native camera app or a dedicated photography app that offers manual controls. Set your camera to its highest resolution and make sure it's in focus. It's best to have a friend or family member help you. If that's not possible, using a tripod to hold your iPhone up to eye level and turning on the rear camera will usually produce a clearer picture.
4 Position Yourself Correctly
Make sure nothing is blocking your view, including glasses and hats. Then you can choose to stand or sit with your back straight and facing the camera. Make sure your head is in the center of the frame and your eyes are looking directly at the camera. Avoid tilting your head or looking to one side.
5 Take Multiple Shots
It's always a good idea to take several photos. This gives you the flexibility to choose the best one and also ensures you have a backup in case something goes wrong. After taking a few shots, review them carefully. Mainly check clarity, facial expressions, positioning, and shadows. Don't worry about size and framing, they can be cropped and straightened in the next step.
Part 3: How to Edit and Optimize Your Passport Photo
Now that you've taken your passport photo with your iPhone, the next step is to ensure it meets all the necessary criteria for submission. While the iPhone camera is impressive, sometimes a little extra help is needed to perfect the image.
If you are not satisfied with the background or clarity of the photo, you can use AVCLabs PhotoPro AI to edit it. AVCLabs PhotoPro AI is an AI-driven photo editing tool that allows users to improve the image quality, replace the background, enlarge the image, colorize photos, etc. in just a few simple steps.

AVCLabs PhotoPro AI
- Change the background of photo in one click.
- Enhance photo up to HD quality.
- Transfrom photo into different types of art styles, such as anime and sketches.
- Colorize black and white photos automatically.
For example, you can enhance the quality of your passport photo by following these steps:
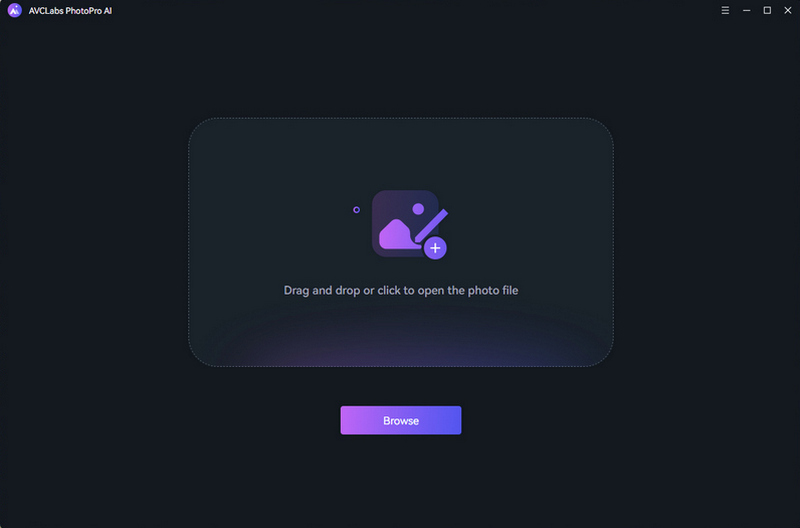
- Step 1 Select the passport photo and upload it in AVCLabs.
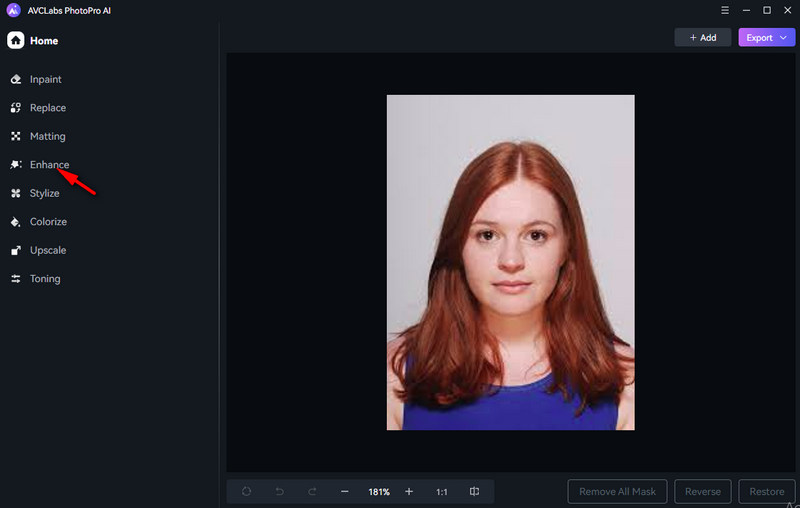
- Step 2 Select Enhance in the left toolbar.
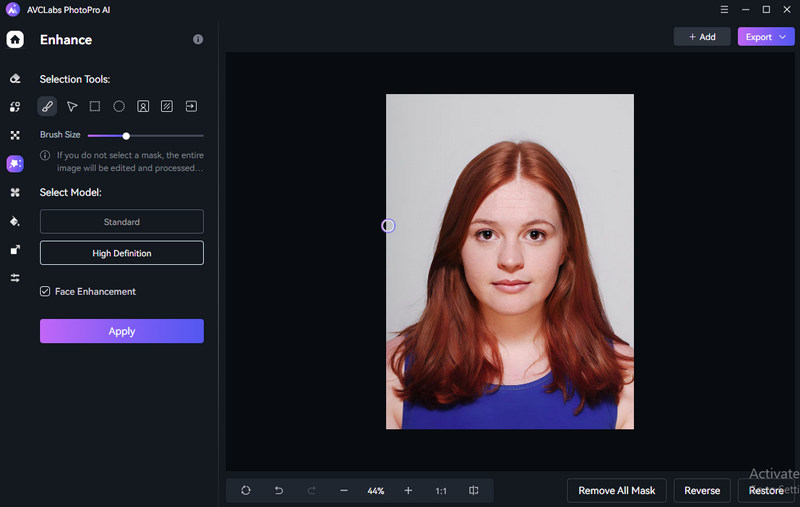
- Step 3 You can choose the model of High Definition and check the Face Enhancement option here. Then click Apply.
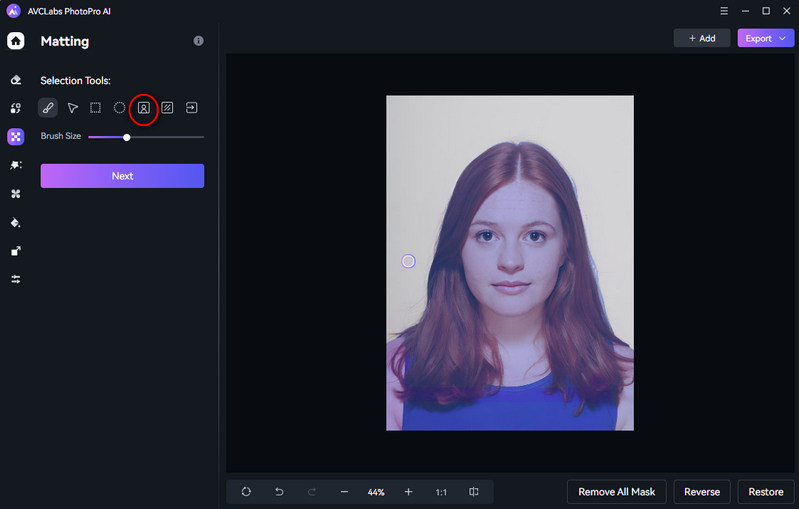
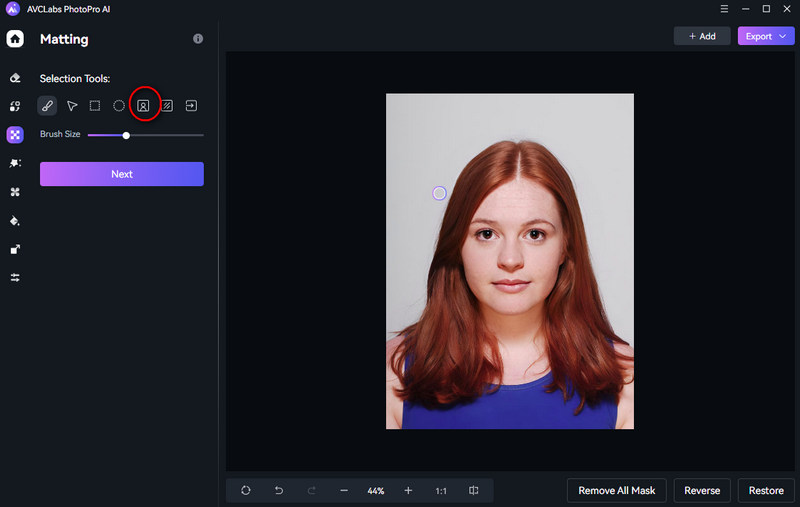
- Step 4 Choose the Matting tool in the left bar.
- Step 5 Use the Foreground selection tool to intelligently extract a portrait in passport photo. Then click Next.
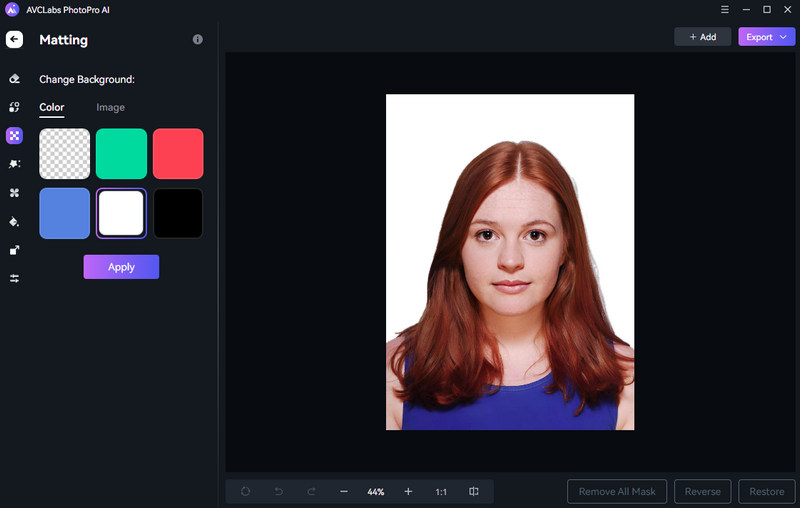
- Step 6 The program will automatically extract the portrait, and then you can change the background as needed, such as choosing white as the new background. Once you have completed the replacement, you can click Export to save your passport photo.
If you want to change your passport photo background, you can continue to do the following steps:
Part 4: FAQs About Taking Passport Photos
How to take a 2x2 passport photo on iPhone?
Select the photo in Photo, then "Print". In the print window select custom paper size and enter the desired photo size (2x2). Then don't print, save it as a PDF. Now we have a new photo with the desired physical size (e.g. 2x2). Now you can export as jpg.
Does the iPhone have a passport photo app?
Of course. You can download many third-party apps in the App Store to help you take and edit passport photos on your iPhone. For example, Passport Photo - ID Photo App is a passport photo editing app that can help you make, edit and print passport, ID card, or visa photos for free.
Conclusion
In this article, we provide you with a detailed guide on how to take passport photo with iPhone. Just follow the standard steps and you can quickly get a perfect passport photo at home. If it’s not perfect, AVCLabs PhotoPro AI can enhance it with just a few clicks. So if you are eager to try it now, why not take action now!


