Ever open a photo that looks a little soft or blurry? Don't worry, it happens to the best of us! Luckily, Photoshop has powerful tools to fix blurry photo, sharpen your photos and bring out the crisp details.
This guide will show you 4 easy-to-use methods of how to sharpen image in Photoshop. Each method has its strengths and works best in different situations. By the end, you'll be able to choose the perfect sharpening technique to make your blurry photos clear and stunning again!
You may also like: How to Remove Someone From A Photo [Easy Guide]
Reading Guide
- Why is Image Sharpening So Important?
- How to Sharpen Image in Photoshop?
- Method 1: Use Unsharp Mask to Sharpen Image
- Method 2: Use Smart Sharpen to Sharpen Image
- Method 3: Use High Pass Filter to Sharpen Image
- Method 4: Use Camera Raw Filter to Sharpen Image
- Photoshop Alternative to Sharpen Image in One-Click
- FAQs about Sharpen Image in Photoshop
Part 1: Why is Image Sharpening So Important?
Image sharpening is an image processing technique that aims to make an image look clearer and more vivid by enhancing the edge contrast in the picture. Sharpening images plays an important role for both professional workers and personal enthusiasts:
- Improve visual clarity: Sharpening can enhance the details in an image and fix blurry photo, thereby improving the overall visual experience. Sharpened images tend to be more eye-catching because the clear details and distinct edges can enhance the visual impact of the image.
- Correct shooting defects: During the shooting process, the image may not be clear enough due to lens, focus, or motion blur. Sharpening can compensate for these limitations to a certain extent in post-processing.
- Adapt to different display devices: Different display devices have different image resolutions and color representations. Sharpening can help images maintain consistent visual effects on multiple devices.
- Web display and printing: When sharing images on the web, they may lose some clarity due to compression and different viewing conditions. Proper sharpening can ensure that the image maintains good quality when it is transmitted on the web, and can also help the image show better details and clarity on paper.
Therefore, image sharpening is an indispensable step in image post-processing. It can not only improve the image quality but also enhance the expressiveness of the work. Now let's start learning how to sharpen image in Photoshop!
Part 2: How to Sharpen Image in Photoshop?
Photoshop has a wealth of features and filters to help users edit images. You can use Unsharp Mask, Smart Sharpen, High Pass Filter, Camera Raw Filter to sharpen images in Photoshop. Below we will show you how to do so:
Method 1: Use Unsharp Mask to Sharpen Image
The first method is to use Unsharp Mask to sharpen image, which is a common sharpening technique in Photoshop. It mainly sharpens the image by enhancing the contrast of the edges. This method is suitable for the general sharpening of most images, especially when it is necessary to quickly improve the clarity of the image. It is relatively simple to operate and suitable for beginners.
How to Sharpen Image in Photoshop by Using Unsharp Mask?
- Step 1 Open your image in Photoshop. In the Layers panel, right-click on the Background layer and choose Duplicate Layer to create a backup layer.
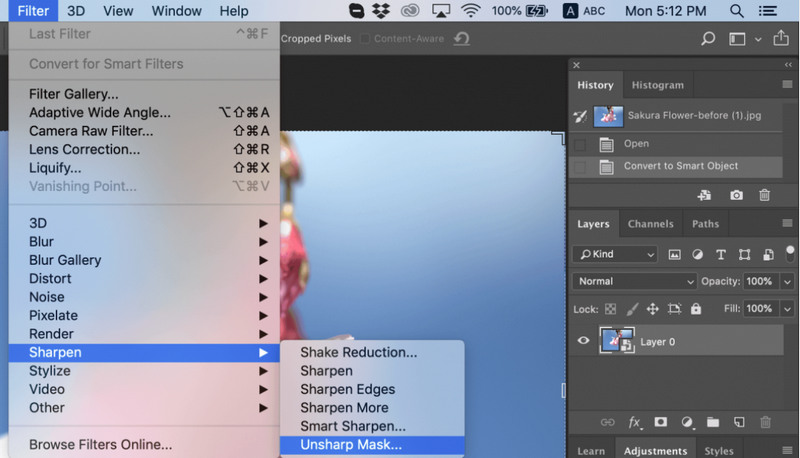
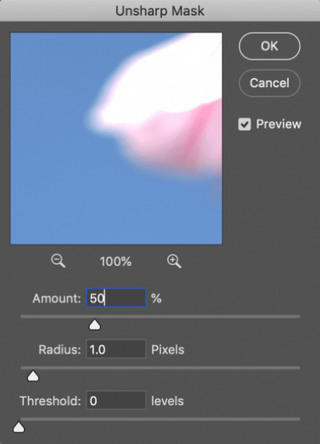
- Step 2 Select Filter > Sharpen > Unsharp Mask in the Menu bar.
- Step 3 Adjust parameters including Amount, Radius, and Threshold.
- Amount: Controls the degree of sharpening, usually set between 50% and 200%. The higher the value, the more pronounced the sharpening effect.
- Radius: Determines the range of edge sharpening, with smaller radius values (such as 0.5 to 1.0) suitable for small details and larger radius values (such as 2.0 and above) suitable for sharpening larger areas.
- Threshold: Sets the contrast difference between the edge and the surrounding area. A higher threshold can reduce noise but may make the image look a little blurry; a lower threshold can increase sharpening but may introduce noise.
- Step 4 Click the "Preview" button to see the sharpening effect. Adjust the parameters as needed until you are satisfied. Click "OK" to apply the Unsharp Mask effect. Then save your image.
Method 2: Use Smart Sharpen to Sharpen Image
The second method is to use the Smart Sharpen tool to sharpen image in Photoshop. The benefit of this method is that it provides more control options, allowing users to make fine adjustments based on different blur types and needs. It is very suitable for processing images with specific blur types, such as motion blur or lens blur.
How to Sharpen Image in Photoshop by Using Smart Sharpen?
- Step 1 Open the image in Photoshop. Create a Duplicate Layer as the backup layer.
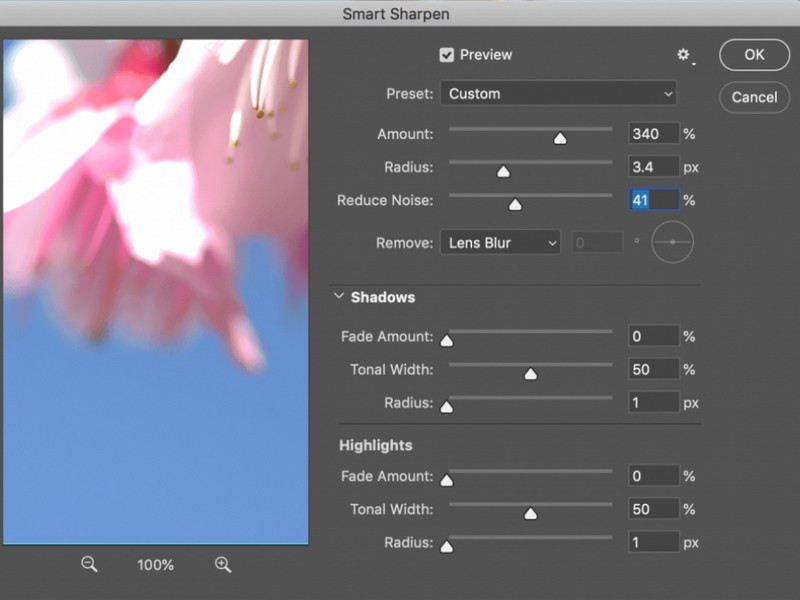
- Step 2 Select Filter > Sharpen > Smart Sharpen in the Menu bar.
- Step 3 Adjust the Amount and Radius as needed.
- Amount: Controls the intensity of sharpening. The higher the value, the more obvious the sharpening effect.
- Radius: Determines the width of the sharp edge. A smaller radius value is suitable for detail sharpening, while a larger radius value is suitable for overall sharpening.
- Step 4 Slide the Reduce Noise to adjust the clarity. Select the type of blur you want to remove, including Gaussian Blur, Lens Blur, and Motion Blur.
- Step 5 You can also make more advanced settings, such as adjusting Tonal Width, Radius, and Fade Amount to further refine the sharpening effect.
- Step 6 When you have finished the settings, you can preview the effect. Click OK to save the settings. Then save the image.
Method 3: Use High Pass Filter to Sharpen Image
Using the High Pass Filter to sharpen image in Photoshop is a more complex method that usually requires use in conjunction with layer blending modes. It is more suitable for people with some image processing experience to perform local sharpening or enhance specific details.
How to Sharpen Image in Photoshop by Using High Pass Filter?
- Step 1 Open the image in Photoshop. Right-click Duplicate Layer to create a backup layer.
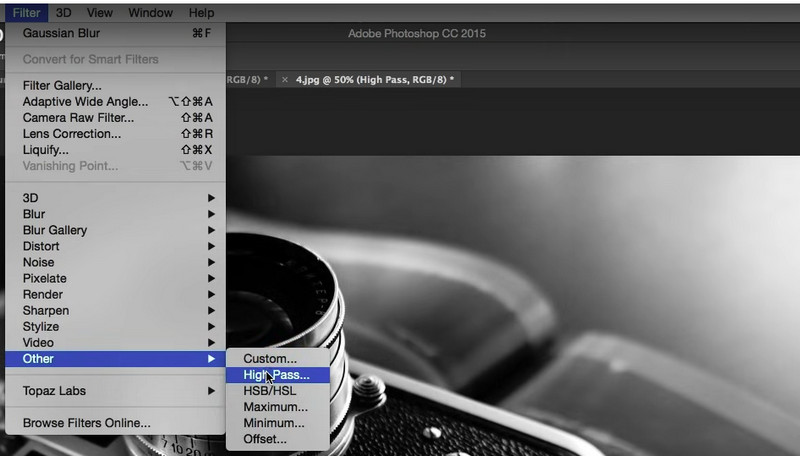
- Step 2 Select Filter > Other > High Pass in the Menu bar.
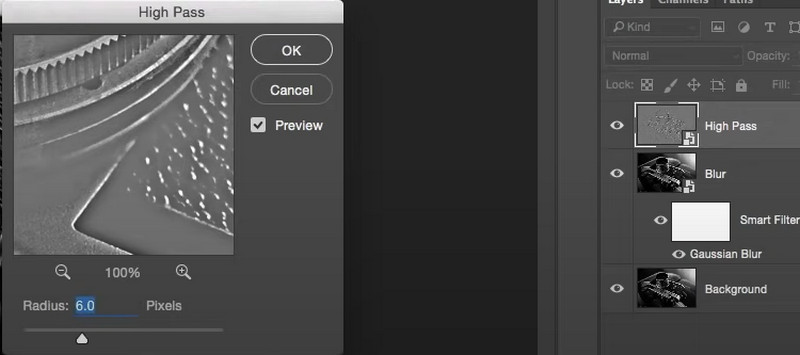
- Step 3 In the pop-up settings window, set an appropriate Radius value. The radius value determines the sensitivity of the edge and is usually set between 1 and 3. Then click OK to save editing.
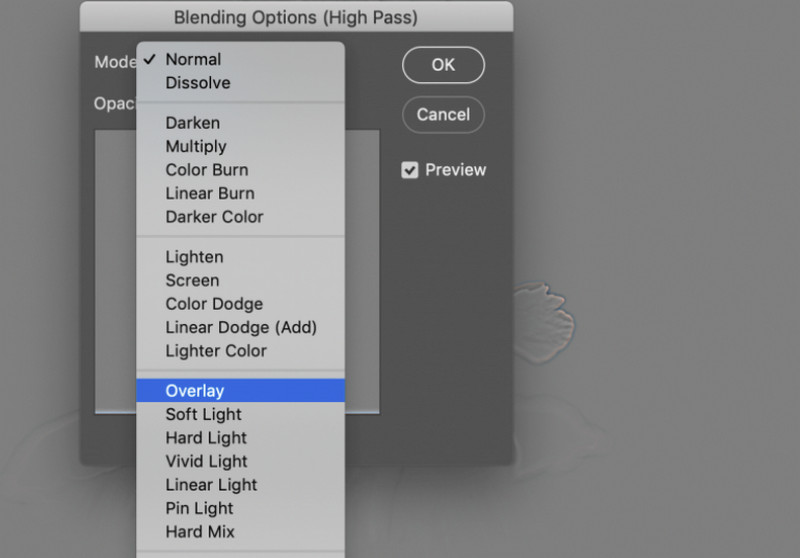
- Step 4 Change the layer's blending mode to Overlay or Soft Light. These two modes can enhance the edge contrast of the image to achieve a sharpening effect.
- Step 5 In the filter dialog box, you can click the Preview button to view the sharpening effect under the current settings. Click OK to apply the high-pass filter.
Method 4: Use Camera Raw Filter to Sharpen Image
The last method is to use the Camera Raw filter to sharpen the image, which is suitable for post-processing of RAW format images. It provides comprehensive adjustments, including color and exposure, and is suitable for professional photographers.
How to Sharpen Image in Photoshop by Using Camera Raw Filter?
- Step 1 Open your RAW image directly in Photoshop. Or create a high-quality copy.
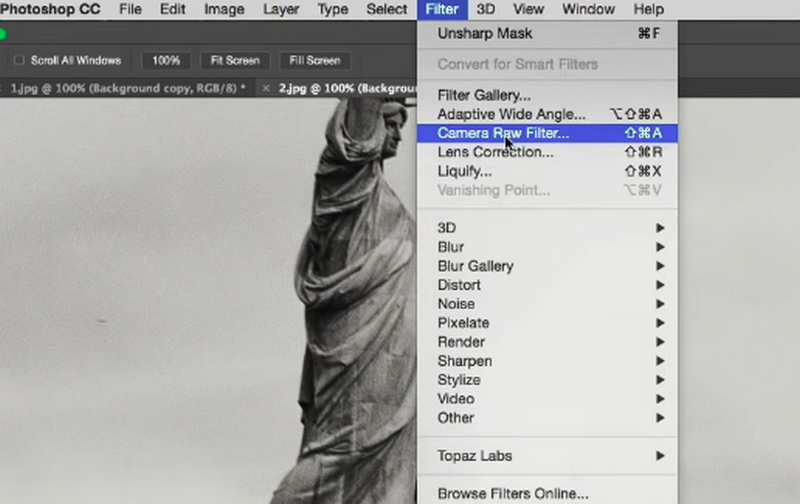
- Step 2 Select Filter > Camera Raw Filter in the Menu bar.
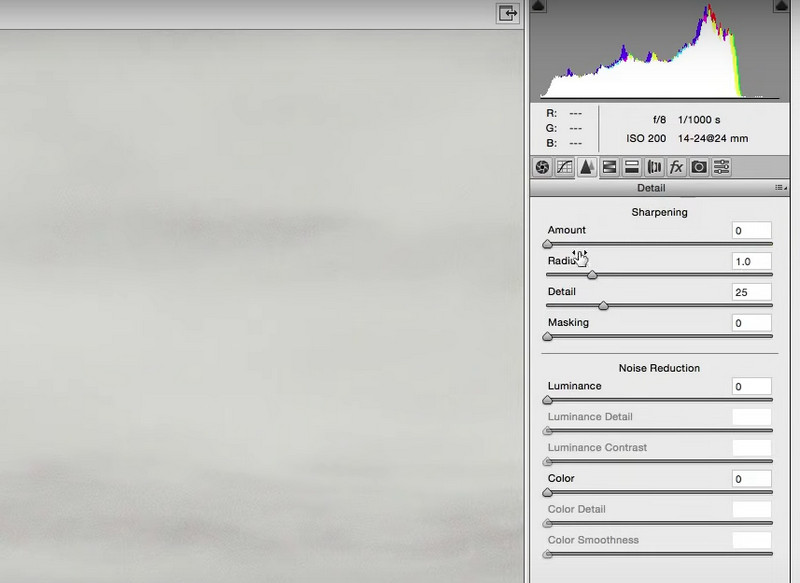
- Step 3 Switch to the Detail panel. Adjust the slider under the Sharpening option to increase or decrease the sharpness of the image. You can keep the default value in the Mask slider.
- Step 4 Once adjustments are made, click the OK button to import the adjusted image into Photoshop for further editing or saving.
Part 3: Photoshop Alternative to Sharpen Image in One-Click
Although Photoshop is a powerful tool for sharpening images, as a professional photo editing software, it requires users to have a certain technical foundation. At the same time, the high subscription fee is also an unnecessary expense for people who do not need to process pictures a lot. So a simple and cheap alternative can be your first choice.
AVCLabs PhotoPro AI is the best alternative to Photoshop. AVCLabs PhotoPro AI is the best alternative to Photoshop. Powered by AI technology, AVCLabs has an intuitive interface that allows even beginners to edit images directly and easily. The program provides a variety of professional functions provided by Photoshop, including image enhancement, repair, colorization, and more.
With the help of AI, AVCLabs' model can automatically analyze and automatically sharpen your images. With just a few easy steps, you can achieve the same sharpening effect as in Photoshop:

AVCLabs PhotoPro AI
- Sharpen blurry photo easily by one click.
- Erase unwant element in the image.
- Transfrom photo into different types of art styles, such as anime and sketches.
- Enter description text to create unique creative photos.
How to Sharpen Image with AI?
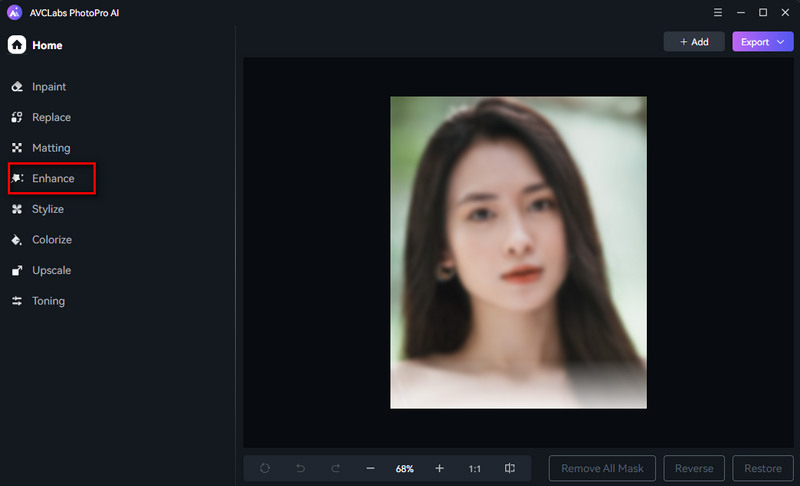
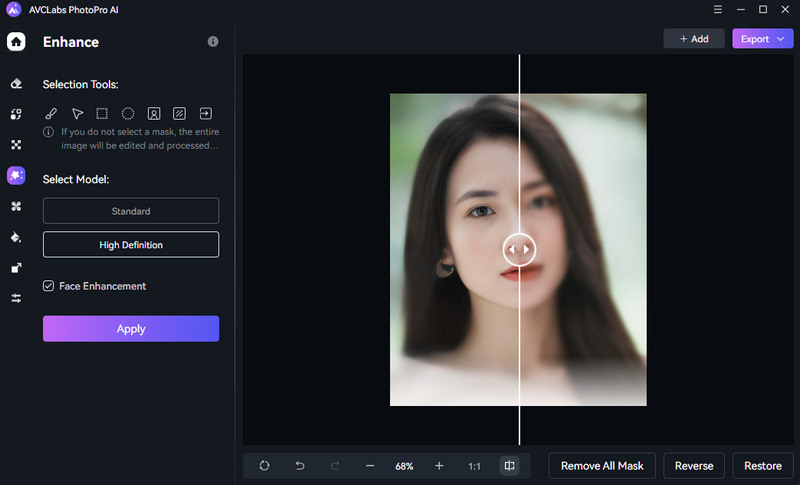
- Step 1 Upload your photo in AVCLabs and select the Enhance tool.
- Step 2 If you want to sharpen a specific part of the image, you can use the brush to select it. Otherwise, the system will sharpen the entire image by default. Select the model and click Apply.
- Step 3 If you are satisfied with the result, click Export to save the image.
Part 4: FAQs about Sharpen Image in Photoshop
How to fix out of focus photos in Photoshop?
To fix out-of-focus photos, you can use the Smart Sharpen filter in Photoshop:
- Select Filter > Sharpen > Smart Sharpen.
- Adjust the Amount and Radius to enhance the clarity of the image.
- Use the Remove drop-down menu to select an appropriate blur type, such as Gaussian Blur for general out-of-focus effects.
How do you sharpen a picture in Photoshop?
There are many ways to sharpen images in Photoshop, such as using Unsharp Mask, Smart Sharpen, High Pass Filter, or Camera Raw Filter. You can choose one of these filters and then adjust the parameters such as radius and amount to achieve the degree you want.
How to sharpen parts of the image selectively?
You can selectively sharpen specific parts of an image by following these steps:
- Duplicate the background layer and apply the Sharpen filter.
- Add a layer mask to the Sharpen layer.
- Use a black brush as the foreground color to paint on the mask to hide the areas you don't want to sharpen and switch the foreground color to white to reveal the sharpening effect.
- Save your edits when you're done.
Conclusion
In this article, we detail four methods to show you how to sharpen image in Photoshop. But if Photoshop is too difficult to learn for you, you can also use AVCLabs PhotoPro AI to sharpen images with one click.
Choosing the right sharpening method for your image can significantly improve the final visual result. Hope this article can help you master image sharpening techniques in Photoshop and make your works more vivid and vivid.