Have you ever taken the perfect photo only to realize that a special someone is missing from the shot? When we take a family portrait or a group selfie with friends, sometimes the people who matter most aren’t there. Fortunately, we can Photoshop someone into a picture as if they were there all along.
In this article, we’ll show you how to Photoshop someone into a picture, and offers tips and tricks to ensure the final result looks natural and flawless. If you think using Photoshop is too difficult, no worry, there is also an easier way for you to blend two images together with AI. Let's get started.
You may also like: How to Remove Someone From A Photo [Easy Guide]
Reading Guide
Part 1: How To Photoshop Someone Into A Picture?
Before you start to Photoshop someone into a picture, there are some key considerations for choosing pictures.
Choosing the right photos is crucial for achieving a natural and convincing result. The images need to be compatible in terms of lighting, shadows, perspective, quality, etc.
- Lighting and Shadows: Ensure both pictures have similar lighting and shadow conditions. This makes the person look naturally integrated into the new scene.
- Resolution and Quality: Use high-resolution images with similar quality to avoid noticeable differences in sharpness or grain.
- Perspective and Angles: Match the perspectives and angles in both images. The inserted person should be facing the same direction and positioned naturally.
- Color and Tone: Ensure the color tones and saturation levels are similar to avoid a jarring contrast between the person and the new background.
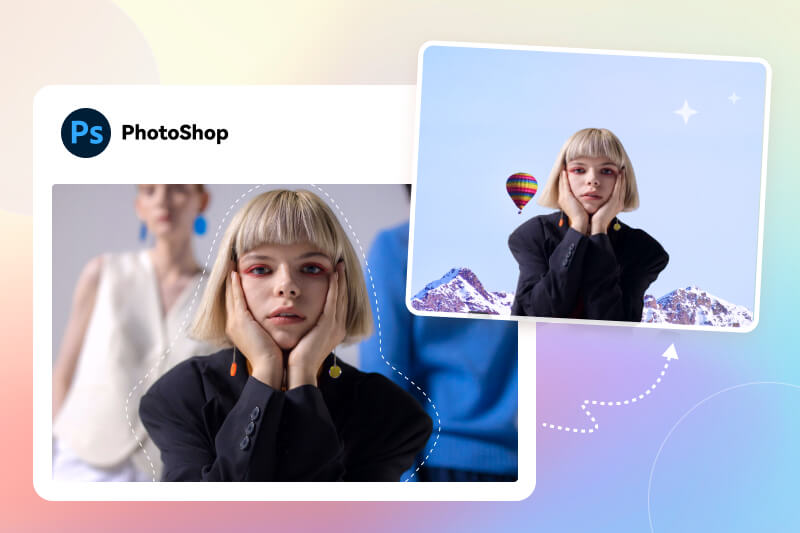
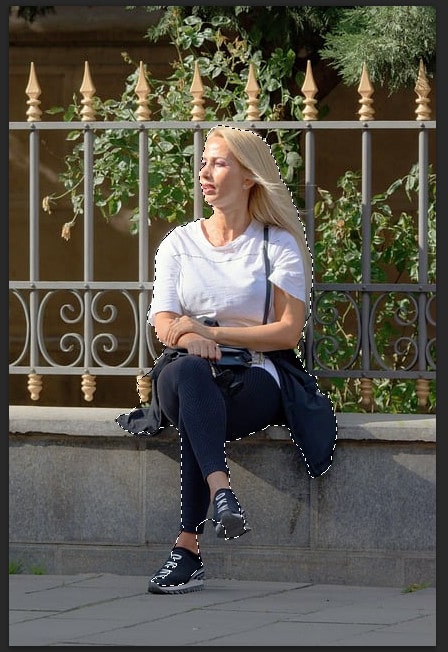
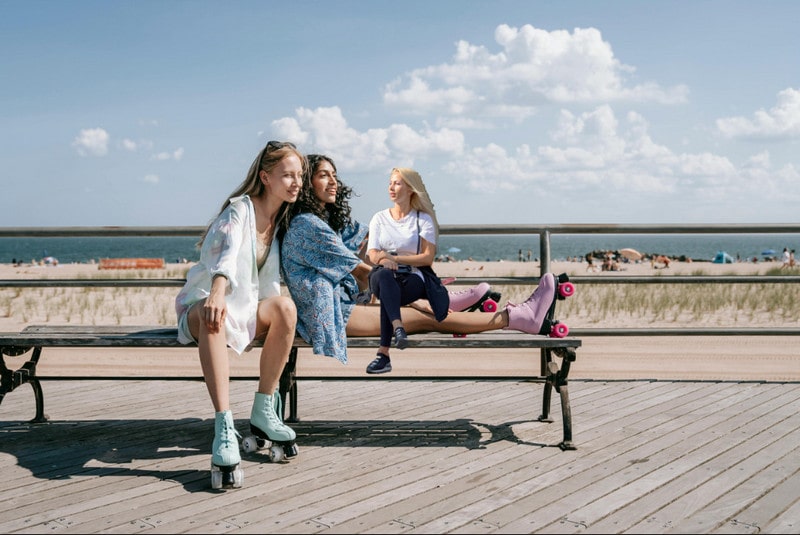
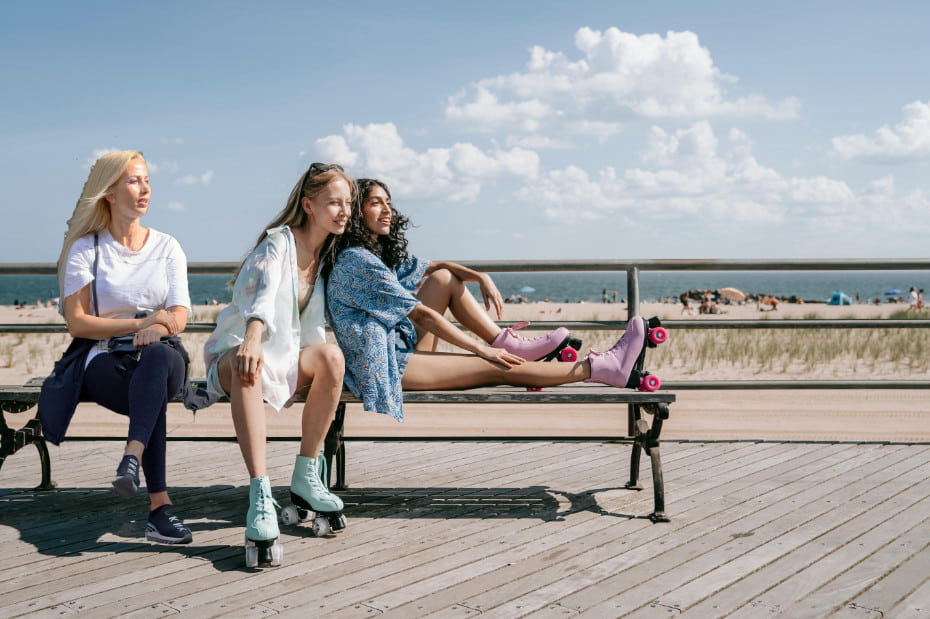
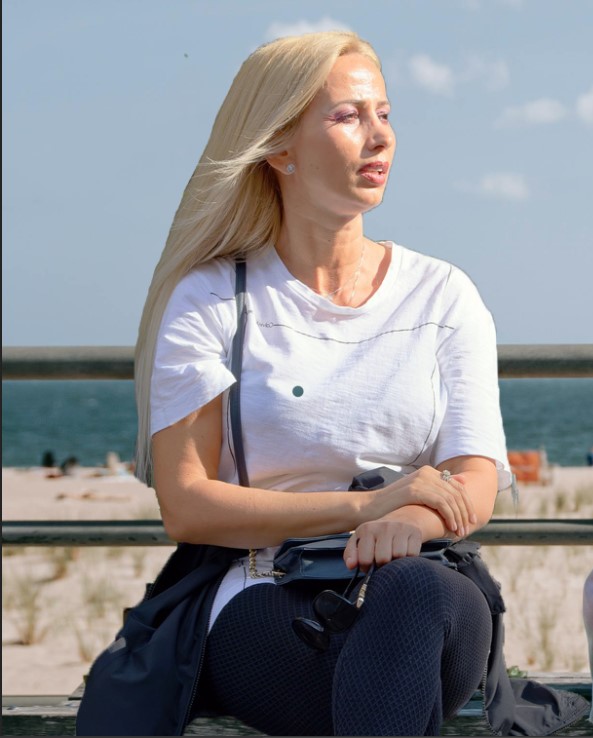
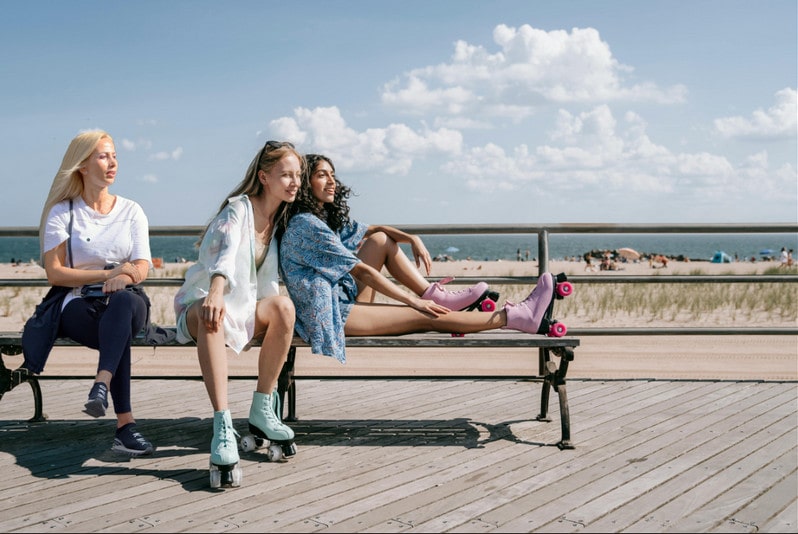
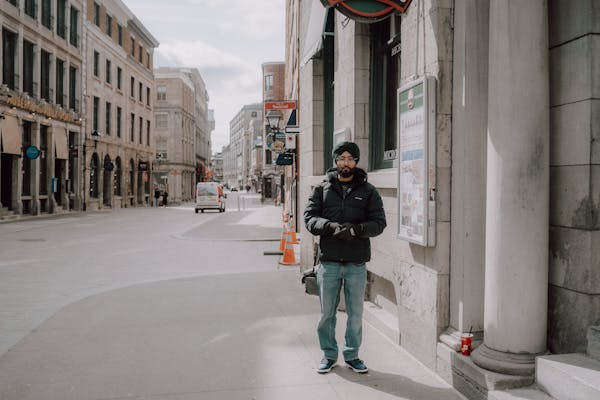
Now, in the following, we will use the following two pictures as examples to demonstrate the whole process. You can see that the two pictures are taken from similar angles, and they are both in HD quality. Although they face different directions and the color tone is different, we can fix it with some tricks.

Step 1 Open the Images in Photoshop
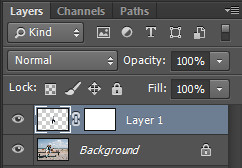
Use File > Open to select and open the original image which includes the person and target image to which you want to add the person. On opening the images, you will see a background layer on the right panel.
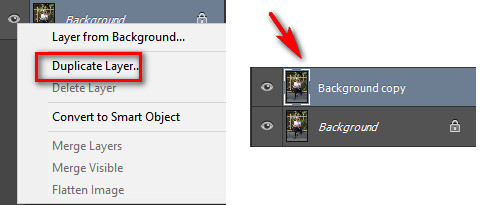
Step 2 Duplicate the Background Layer
To avoid any mis-operation, the safe way is to back up the original image by duplicating the background layer. Here are two ways: right-click on the background layer and select “Duplicate Layer” or click on the background layer and press Ctrl+J to back up the original image.
Step 3 Cut the Person Out
Use a selection tool to outline the person you want to add to the new background. Selection tools include the Lasso Tool, Polygonal Lasso Tool, Magnet Lasso Tool, Quick Selection Tool or Magic Wand Tool and they fit different scenarios.
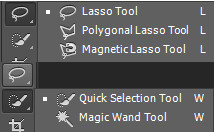
- Lasso tool: The Lasso Tool allows freehand selections by drawing around the area you want to select. Ideal for irregular shapes.
- Quick Selection Tool: The Polygonal Lasso Tool creates selections with straight lines between clicked points. Perfect for geometric shapes and straight edges.
- Magnetic Lasso Tool: The Magnetic Lasso Tool snaps to the edges of objects as you trace, detecting color and brightness differences. Great for objects with defined edges.
- Quick Selection Tool: The Quick Selection Tool selects areas by painting over them with an adjustable brush, automatically selecting similar tones and textures. Fast for large areas.
- Magic Wand Tool: The Magic Wand Tool selects pixels of similar color with one click, adjustable by tolerance. Useful for solid or uniformly colored areas.
For more tips, refer to the official guide: Make Selections in Photoshop
Here we will use the Quick Selection Tool. Click over the person, and an area of the person will be automatically selected. If you accidentally select more area, hold the Alt key (Windows) or Option key (Mac) to subtract from the selection.
Note: If you are using a newer version of Photoshop, you can click Object Selection Tool for easier selection.
Step 4 Move the Cutout to the Target Image
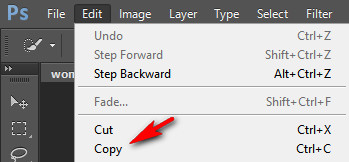
With the person selected, copy it by pressing Ctrl+C (Windows) or Cmd+C (Mac) or click Edit > Copy button. Switch to the target image and paste the person by pressing Ctrl+V (Windows) or Cmd+V (Mac). The person will appear as a new layer in the target image. If you are a seasoned editor, click on the Move tool to directly drag the selected person to the target picture, and then release it.
You can see the copied person is much smaller than the other two girls and is not properly positioned. Don't worry, we will drag the person to the appropriate place and resize her in our next step.
Step 5 Position and Resize
Press Ctrl+T (Windows) or Cmd+T (Mac) to activate Free Transform. First of all, drag the selected person to the appropriate place. Then drag the corners to adjust the size so that she is as big as the two other girls. Don't forget to hold down the Shift key while dragging. This can maintain the aspect ratio without deforming the person. Press Enter to apply the transformation. Right-click on the person, and choose Flip Horizontally.
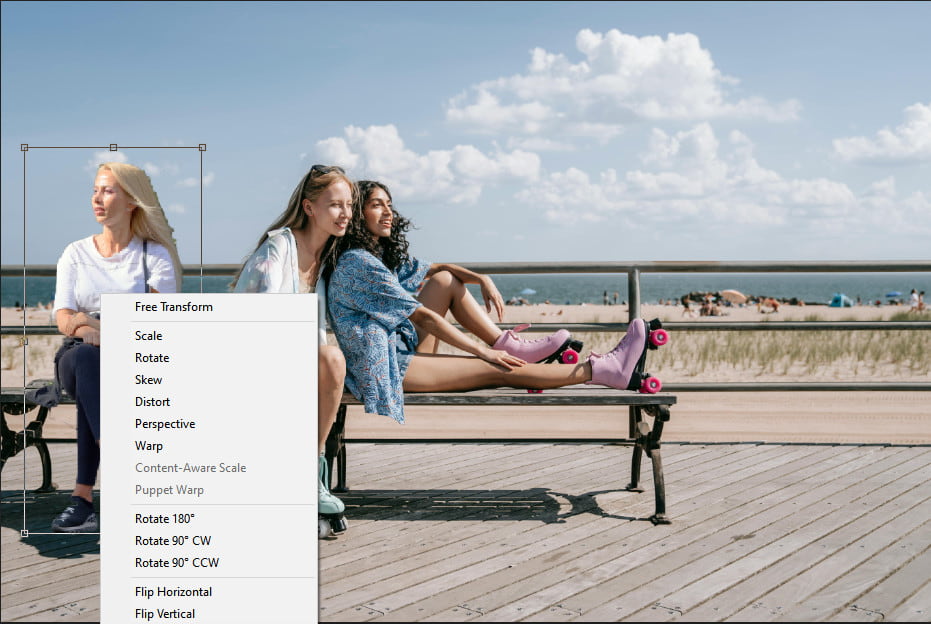
Now the transferred person in the original image is at the same angle as the two persons in the target photo. If the person you choose faces the same direction with the person in the target image, then this step can be omitted.
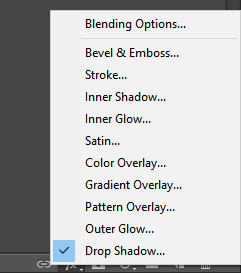
Step 6 Refine the Selection
Now. it's time to polish the selection by removing redundant parts that do not belong to this person. With the person selected, click the Add Layer Mask button at the bottom of the Layers panel. This will mask out the background and keep the person.
Press E on your keyboard or select the Eraser Tool from the toolbar.
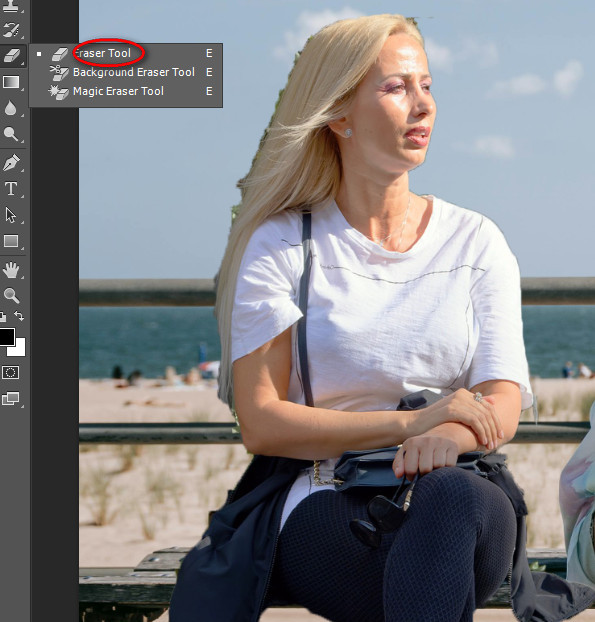
In the options bar at the top, adjust the size, hardness, and opacity of the Eraser Tool. Use a soft brush for refining edges and a hard brush for more precise erasing.

Click on the layer mask thumbnail to select it.
Use the Eraser Tool to carefully erase any unwanted parts of the selection. This will refine the edges and remove any leftover background.
If you erase too much, switch to the Brush Tool (B) and paint with white to restore parts of the mask.
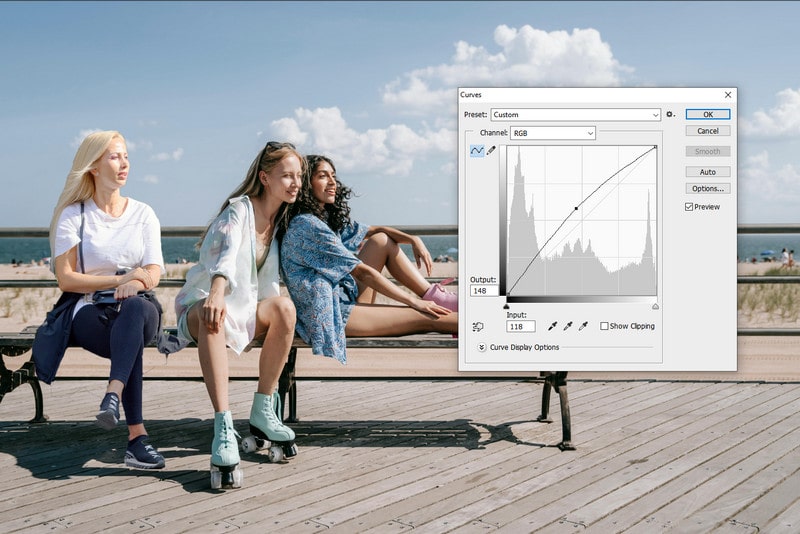
Step 7 Match Lighting and Colors
This is the hardest part. To make the final image more realistic, mind the colors and lighting.
Use Image > Adjustments > Levels or Curves to adjust brightness and contrast.
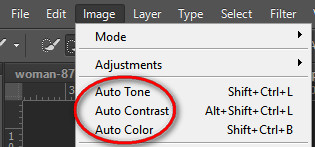
When there is not too much discrepancy in colors and lighting, you can just use the options under image settings to fine-tune the parameters.
Step 8 Create Shadows and Highlights
To make the added person appear more natural, add shadows and highlights that match the lighting of the background image. Create a new layer underneath the person’s layer. Use the Brush Tool with a soft, black brush to paint shadows. Lower the opacity of the layer to make the shadow look realistic.
For highlights, create a new layer above the person’s layer and use a soft, white brush to add highlights where the light would naturally hit.
Step 9 Final Touches
Zoom in and carefully inspect the image for any imperfections. Use the Clone Stamp Tool or Healing Brush Tool to fix any areas that need touch-ups.
Adjust the overall image using Image > Adjustments > Brightness/Contrast or Image > Adjustments > Vibrance to ensure the final image looks cohesive.
Part 2: How to Add Someone to A Photo Without Photoshop?
Using Photoshop to add a person to the photo may be challenging for beginners. Luckily, some third-party software allows users to finish the task perfectly without any hassle. AVCLabs PhotoPro AI is such a comprehensive yet easy-to-use image editing software that automates complicated image editing tasks, including an easy method to add someone to a photo. The program provides a complete set of AI tools and gives your photo a polished look in an instant.

AVCLabs PhotoPro AI
- AI technology for Max. 400% lossless Enlargement
- Remove unwanted elements in the image.
- Replace any existing object with text prompts.
- Instant background removal and replacement.
- Colorize black-and-white photos in one click.
- Fix Blurry human face and bring back details.
- Auto color calibration and correction.
How to Add A Person to A Photo with AI?
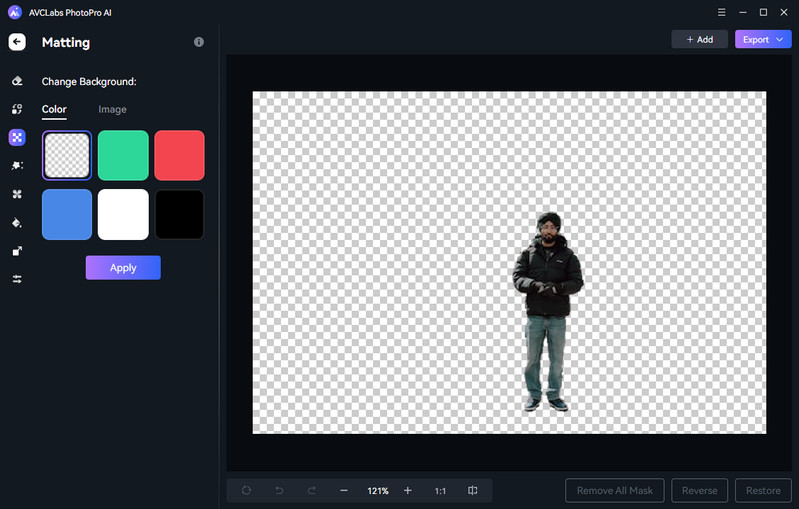
- Launch the program and Load an Image with the subject.
- Click the Matting tool on the left menu bar, use the object selection tool to select the person, and click on Next, and you will get a cutout of the person with a transparent background.
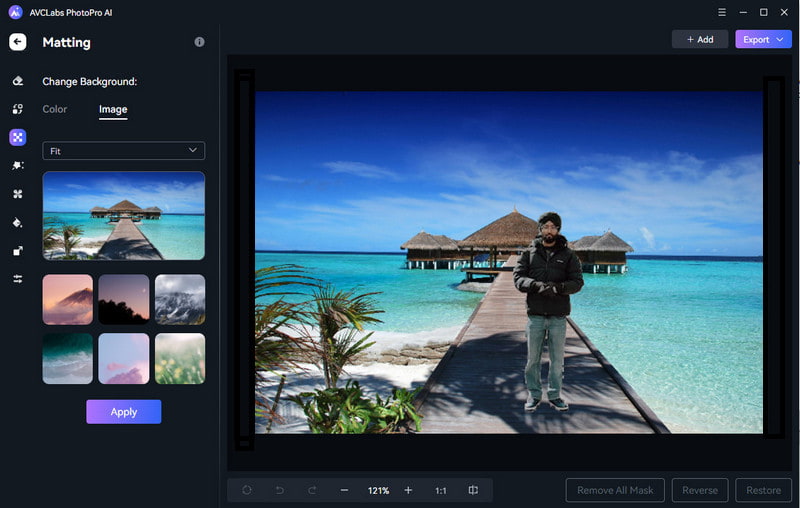
- Click on the Image option and import the image that you want to use a new background.
- That's it, you have successfully inserted a person into a photo.
Part 3: FAQs about How To Photoshop Someone Into A Picture
How to edit people out of photos?
You can use photo editing software like Adobe Photoshop or beginner-friendly alternatives like AVCLabs PhotoPro AI, which uses AI to remove the unwanted person seamlessly from the original image in one click.
How to replace a person in a photo?
Use photo editing software such as Photoshop to select and cut out the person you want to remove. Replace them by copying and pasting another person into the image, then use blending tools and layers to make the replacement look seamless.
How do I photoshop something into another picture?
To photoshop something into another picture, open both images in Photoshop. Select the object you want to insert, copy it, and paste it into the target image. Then, position and resize the object to fit naturally within the new scene. Finally, blend and adjust the object to ensure it looks seamless in the new context.
How to add a picture to another picture on iPhone?
Use apps like Adobe Photoshop Express, PicsArt, or even the built-in Markup tool in the Photos app. Open the base image, import the second image, and adjust its size and position as needed.
Can you photoshop a picture for free?
Yes, you can use free photo editing tools like GIMP, Paint.NET, or online editors like AVCLabs online, which offer many of the same features as Adobe Photoshop without cost.
Conclusion
In this tutorial, we describe how to add someone who was originally missing in the photo with Photoshop. If you are not an experienced editor, you can opt for the alternative method: AVCLabs PhotoPro AI. It just requires two simple steps to cut out the subject and then insert it to the photo. Why not give it a try?